how-to
Send an Auto-Response Confirmation Email to Form Submitters
Let your visitors know their message was received, automatically
Confirm submissions automatically
When someone submits your form, they often wonder if it actually went through. An auto-response fixes that: a short confirmation e-mail sent straight back to the submitter, letting them know their message was received. It’s available on every plan, including Free, and takes a couple of minutes to set up.
Step 1. Link your form to your account
Auto-response only works on linked forms. If your form endpoint isn’t linked to an Un-static account yet, see how to link your form from your form’s admin page.
Step 2. Set the “Reply To” field
In Basic Configuration on your form’s admin page, set the Reply To field to the name of the form field that holds your visitor’s e-mail address, for example email. The auto-response only sends when this field resolves to a valid address, so this step is required before anything else works.
Step 3. Enable auto-response and pick a starting point
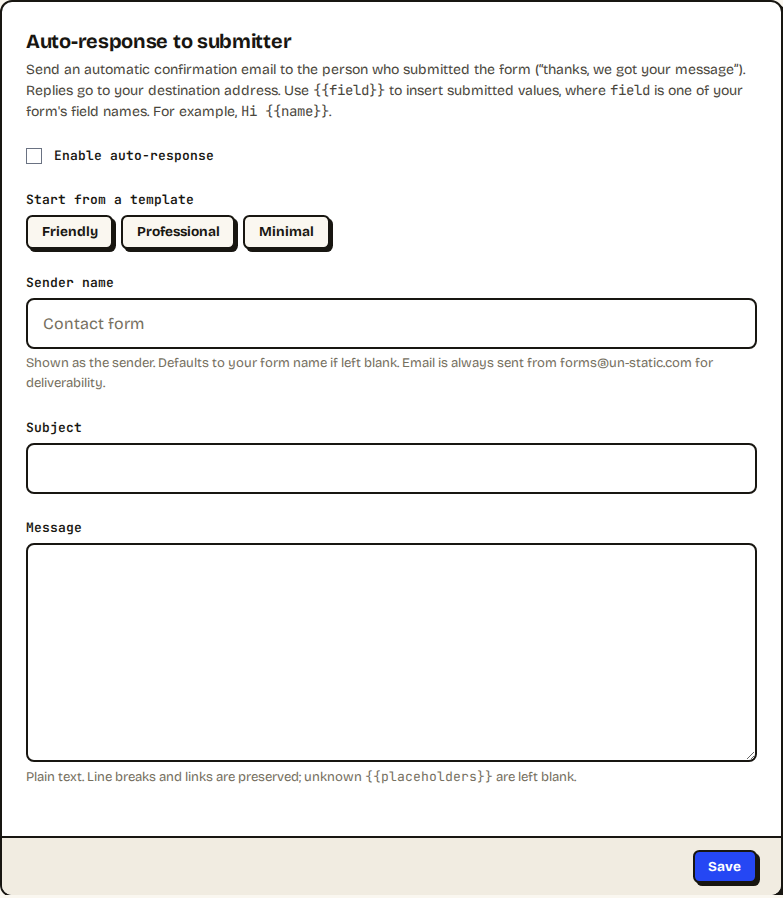
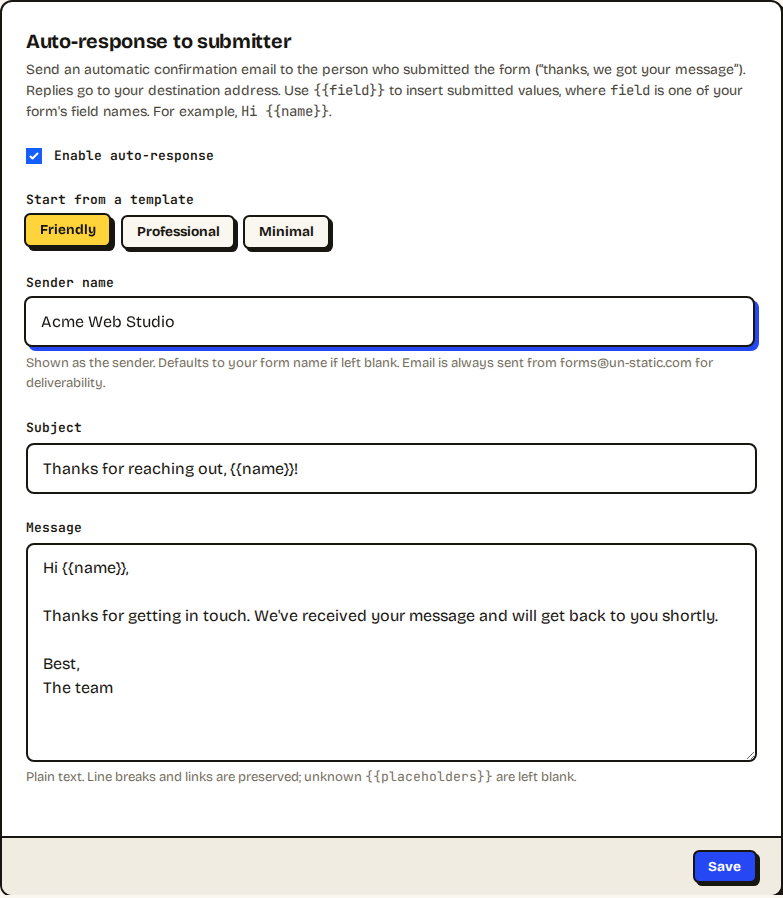
Open the “Auto-response to submitter” card and check Enable auto-response. Start from one of the three starter templates: Friendly, Professional, or Minimal, or write your own subject and message from scratch.
Step 4. Personalize with placeholders
Both the subject and the message accept {{field}} placeholders that get filled in with the values from the submission, for example Hi {{name}}. If a placeholder doesn’t match a field on the submission, it’s simply left blank rather than breaking the mail. Line breaks and links in your message are preserved.
Step 5. Set a sender name
The Sender name is what your visitor sees in their inbox; it defaults to your form’s name if you leave it blank. One thing to know: the mail itself is always sent from [email protected] so it lands reliably in your visitor’s inbox, but any reply they send goes straight to your own destination address.
Safety and availability
The auto-response only fires for clean submissions. Spam, honeypot hits, and submissions over your plan’s limit never trigger it, and it never delays or blocks the submission itself from reaching you. It’s available on every plan, Free included.
For the API and AI agents
Auto-response can also be read and configured through the API: auto_response_enabled, auto_response_subject, auto_response_body, and auto_response_from_name on PUT /api/forms/{reference} (also GET). See the for-ai page for the full quick reference.
Let us know if you run into any issues!